by
by 
In this article we will see how to scan document using iPhone or iPad files app. If your iPhone updated with latest version of iOS, it means you are good to go (i.e. iOS 16, iOS 15 etc.) Your iPhone or iPad will support document scanning via files app. Do you know, you can scan any Printed Document, Photos, Visiting Card, Brochure using files app on iPhone or iPad.
Whenever you will scan any document using iPhone files app, you will get better image quality as compared to iPhone Camera application, the reason is camera app will just capture document photo but your intention is not to capture photo. So if you are creating a digital copy of any document it is better to scan document using iPhone Files app.
Do you know why it is better to use iPhone Files App for Document Scan? Answer is, iPhone files app will do Edge Detection, Angle Correction and Trim Background area of Scanned document. But why background trim is needed while scan any document? Here is the answer, you will get meaningful content for scanned image if background trimmed properly. You can also Save scanned document as pdf to iPhone Storage, iCloud Drive or Share with others.
Steps: Scan Document Using iPhone Files App:
Please refer steps below to understand how to scan document using files app on iPhone.
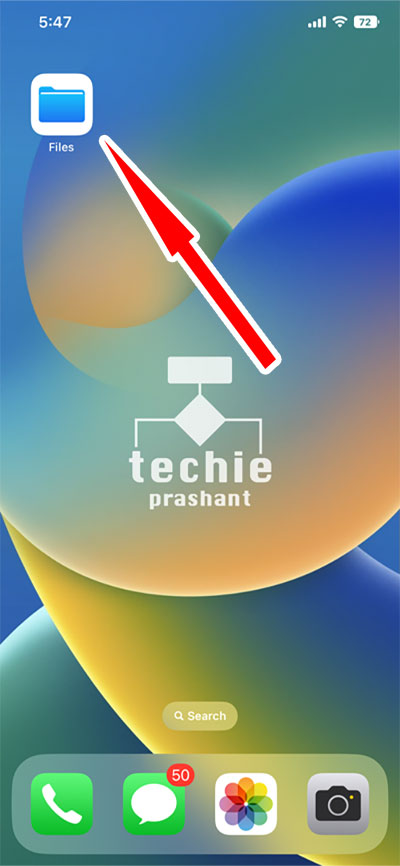
1) Open Files App from iPhone or iPad
If your iPhone or iPad updated with latest version of iOS, then you are good to go because it comes with Files App by default.
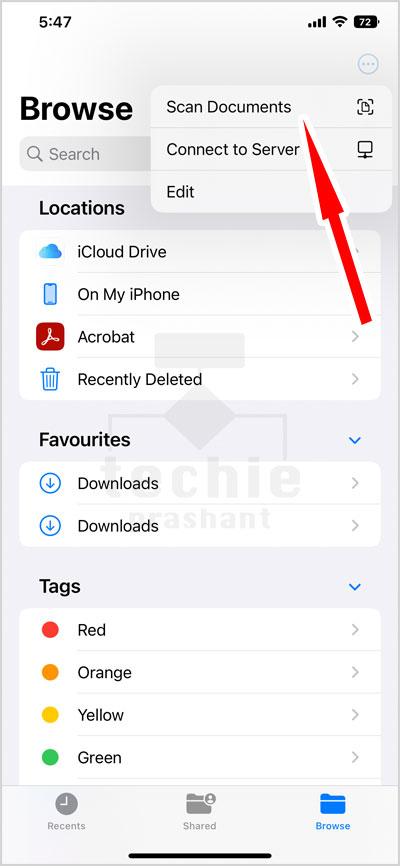
2) Tap “Three Dots” Button at Top Right Corner
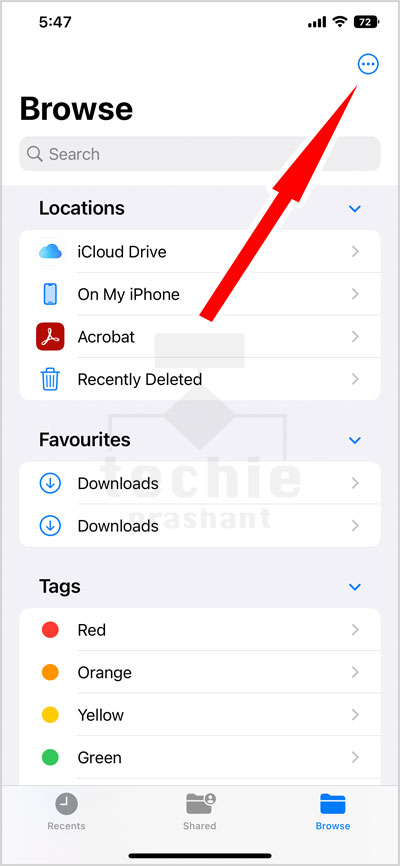
3) Select “Scan Documents” from Sub Menu
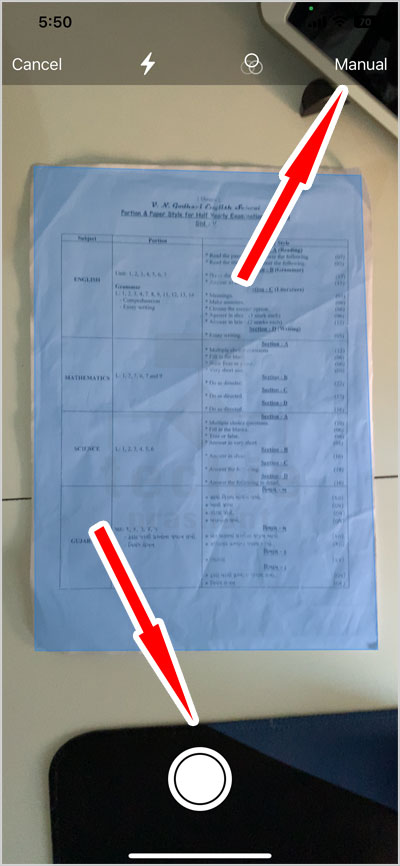
4) Set “Manual Mode” and Tap “Capture” Button ( i.e. Scan Document Using iPhone)
Default Automatic Mode is on within Scan interface. So as soon as it detect document, it will be captured automatically. But for better scan control I will suggest to set Manual Mode by tapping at top right where it shows Automatic button. Within screenshot below I already did that, so it is showing Manual mode at present.
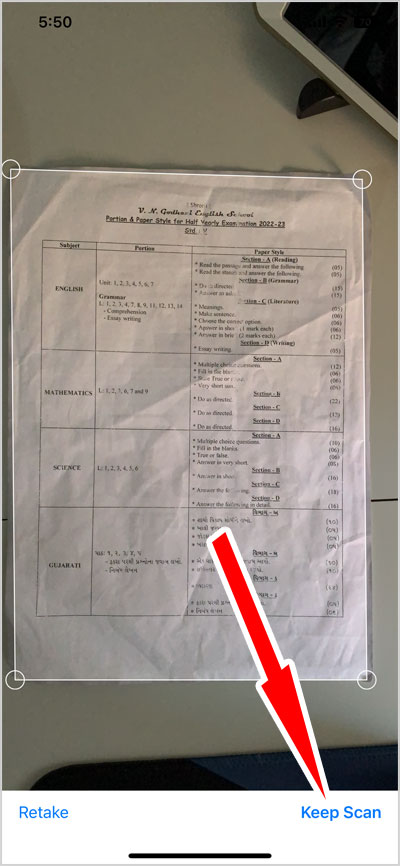
5) Tap “Keep Scan” Button. It will Confirm Scan Copy of the Document
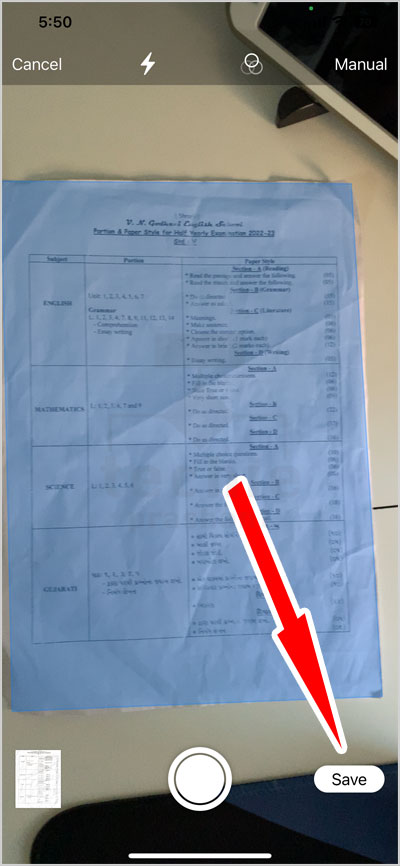
6) Tap “Save” Button at Bottom Right (i.e. After Scan Document Using iPhone)
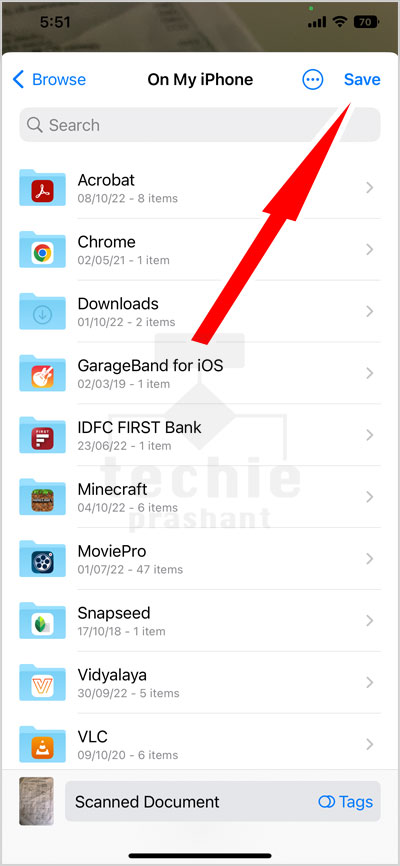
7) Tap “On My iPhone” from Browse Screen Pop Over

8) Tap “Save” Button at Top Right
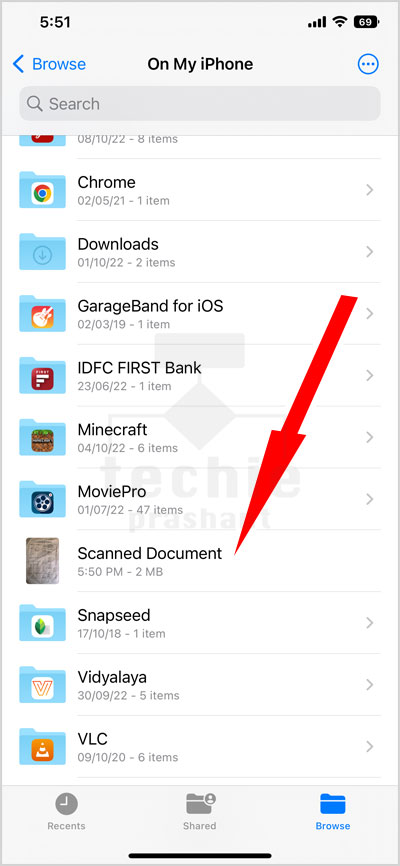
9) You Will See “Scanned Document” within “On My iPhone” Folder
10) Good Luck – All Steps Done for Scan Document using iPhone Files App
Note: If you have older version of iOS, please refer this tutorial How to Scan Document Using Notes App in iPhone
Video Tutorial in HINDI
Scan Document Using iPhone Files App